Your dream of living the van life is now possible even without a van involved, thanks to trailers. Now with time on your hands, you can make it even more possible by building the trailer yourself.
The good news is that materials are made readily available in the market. The beauty of doing it yourself is you can customize it based on your preferences. Now, start your little home project of building your own DIY teardrop trailer with this helpful guide.
Related: A Quick Guide on Building an Enclosed Trailer
Step 1 – Start with a foundation
Like everything else that’s made to touch the ground, you have to start with the foundation. For teardrop trailers, it’s usually composed of two wheels attached on a large frame that will hold the base.
Your foundations should be strong enough to hold everything in the trailer. Take into consideration the size and your plans inside the trailer so you’d know how to calculate the capacity of the foundation.
You can actually buy a teardrop trailer kit to be used for the foundation. You can also find aluminum teardrop trailer kits available for purchase. If you prefer using an old one, make sure you should check the wheel bearings if greasing is needed. Also check the frame for rust to avoid further damages.
Step 2 – Make the base
Once the frame’s all fixed, cut a sheet of plywood that will act as the base or flooring of your DIY teardrop trailer. If you’re using a kit, you don’t have to cut out your own plywood, but if you’re doing it from scratch, remember to line it up properly to your trailer’s foundation.
Now, work on the insulation of your flooring before lining it up with another plywood. Some kits may not have insulation available, but take note that this is one important feature of your flooring.
Step 3 – Shape the walls
For teardrop trailers, shaping the walls is where the fun happens. This is where you can customize the shape, size of the curve, height and other measurements of your teardrop trailer.
Before attaching the walls, make sure to cut out spaces where the wirings and vents will go. Most would already cut off holes for the doors and windows which is the best thing to do.
Attach the walls on both sides of the base by screwing them to place. Use a strong glue as well to seal up the sides of the walls.
 Step 4 – Don’t forget the wires
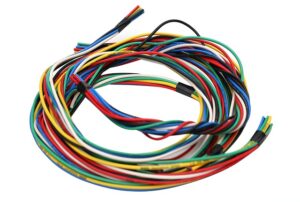
Wires need spaces inside the trailer so you have to make sure to install them first in your interiors. With knowing where the wires go, you can easily hide them once you’ve worked with the galley and other interior parts.
Start your wiring by purchasing a marine battery, where all the wires will be connected. Plan where all the lights and electric fixtures will go so your wires won’t go criss-crossing with each other. You may have to drill holes on the walls for proper wire placements.
Step 5 – Work your interiors
The thing about teardrop trailers is that it has a very limited space. So you have to work first on your interiors before covering it up with a roof. This makes your movement and changes inside easier.
Install cabinets, the galley, and kitchen fixtures and make sure they’re secured in place. At this point, your foundation must be able to hold everything up properly.
Step 6 – Insulate the roof
Now that your interiors are fixed, it’s time to work on the roof. Start with patching it all up with an interior roof and insulating it, before covering it up with an exterior roof that smoothens it. Now you can see how your teardrop trailer looks pretty much now.
The key to succeeding on the shape of the roof is the cut. Remember to take proper measurements so you can cut it the exact shape it should be.
Step 7 – Prettify it with finishes and fixtures
So you’ve built a working trailer, it’s now time to prettify it to make it look more inviting. Paint the exterior with your preferred color and smoothen it up with a strong, gloss finish.
As you do the exteriors, you can work your interior finishes too. Paint jobs, smoothing and glossing here and there would be one of the fun parts of building your own teardrop trailer.
Work on the interiors by adding the fixtures you want. Since the space is really limited, it’s important to plan all the features and functions of the trailer carefully for your use. Check out these RV organization ideas.
 Step 8 – Install the teardrop trailer windows
After all these are done, it’s time to add in other important details. Windows and doors must be installed properly and should only use quality materials that’s made for life outdoors.
Most teardrop trailer windows are not the cookie-cutter kind. They mostly needed customization on measurements, shapes and kinds fit for every type of owner. For this part, finding the best window manufacturer is recommended. Poor installation or window customization can bring you problems in the future.
Building your own teardrop trailer is a challenge, but if you’re up for it, you’ll reap the benefits in the long run. Plus, it’s also a fun home project you can do to be productive in your free time.
For window customization however, you will need a little help for this. Allow us at Peninsula Glass – Motion Windows find the perfect window or customize it according to your needs. For window costings and recommendations, simply give us a call.

 Step 4 – Don’t forget the wires
 Step 8 – Install the teardrop trailer windows